//AppDelegate.Swift
//
// AppDelegate.swift
// B929
//
// Created by Induk-cs-1 on 2025/09/29.
//
import UIKit
@main
class AppDelegate: UIResponder, UIApplicationDelegate {
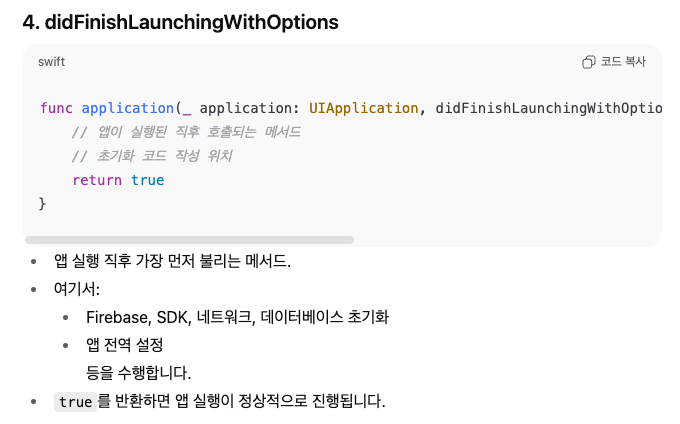
func application(_ application: UIApplication, didFinishLaunchingWithOptions launchOptions: [UIApplication.LaunchOptionsKey: Any]?) -> Bool {
// Override point for customization after application launch.
return true
}
// MARK: UISceneSession Lifecycle
func application(_ application: UIApplication, configurationForConnecting connectingSceneSession: UISceneSession, options: UIScene.ConnectionOptions) -> UISceneConfiguration {
// Called when a new scene session is being created.
// Use this method to select a configuration to create the new scene with.
return UISceneConfiguration(name: "Default Configuration", sessionRole: connectingSceneSession.role)
}
func application(_ application: UIApplication, didDiscardSceneSessions sceneSessions: Set<UISceneSession>) {
// Called when the user discards a scene session.
// If any sessions were discarded while the application was not running, this will be called shortly after application:didFinishLaunchingWithOptions.
// Use this method to release any resources that were specific to the discarded scenes, as they will not return.
}
}


//
//  SceneDelegate.swift
//  B929
//
//  Created by Induk-cs-1 on 2025/09/29.
//

import UIKit

class SceneDelegate: UIResponder, UIWindowSceneDelegate {

    var window: UIWindow?


    func scene(_ scene: UIScene, willConnectTo session: UISceneSession, options connectionOptions: UIScene.ConnectionOptions) {
        // Use this method to optionally configure and attach the UIWindow `window` to the provided UIWindowScene `scene`.
        // If using a storyboard, the `window` property will automatically be initialized and attached to the scene.
        // This delegate does not imply the connecting scene or session are new (see `application:configurationForConnectingSceneSession` instead).
        guard let _ = (scene as? UIWindowScene) else { return }
    }

    func sceneDidDisconnect(_ scene: UIScene) {
        // Called as the scene is being released by the system.
        // This occurs shortly after the scene enters the background, or when its session is discarded.
        // Release any resources associated with this scene that can be re-created the next time the scene connects.
        // The scene may re-connect later, as its session was not necessarily discarded (see `application:didDiscardSceneSessions` instead).
    }

    func sceneDidBecomeActive(_ scene: UIScene) {
        // Called when the scene has moved from an inactive state to an active state.
        // Use this method to restart any tasks that were paused (or not yet started) when the scene was inactive.
    }

    func sceneWillResignActive(_ scene: UIScene) {
        // Called when the scene will move from an active state to an inactive state.
        // This may occur due to temporary interruptions (ex. an incoming phone call).
    }

    func sceneWillEnterForeground(_ scene: UIScene) {
        // Called as the scene transitions from the background to the foreground.
        // Use this method to undo the changes made on entering the background.
    }

    func sceneDidEnterBackground(_ scene: UIScene) {
        // Called as the scene transitions from the foreground to the background.
        // Use this method to save data, release shared resources, and store enough scene-specific state information
        // to restore the scene back to its current state.
    }


}


import Foundation

let weight = 60.0
let height = 170.0
let bmi = weight / (height*height*0.0001) // kg/m*m
var body = ""
if bmi >= 40 {
    body = "3단계 비만"
} else if bmi >= 30 && bmi < 40 { body = "2단계 비만"
} else if bmi >= 25 && bmi < 30 { body = "1단계 비만"
} else if bmi >= 18.5 && bmi < 25 { body = "정상"
} else {
    body = "저체중"
}
print("BMI:\(bmi), 판정:\(body)")
함수 변형 버전
import Foundation

//let weight = 60.0
//let height = 170.0
func calcBMI(weight: Double, Height: Double) -> String{
    let bmi = weight / (Height*Height*0.0001) // kg/m*m
    let shorten = String(format: "%.1f", bmi)
    var body = ""
    if bmi >= 40 {
        body = "3단계 비만"
    } else if bmi >= 30 && bmi < 40 { body = "2단계 비만"
    } else if bmi >= 25 && bmi < 30 { body = "1단계 비만"
    } else if bmi >= 18.5 && bmi < 25 { body = "정상"
    } else {
        body = "저체중"
    }
    return "BMI:\(bmi), 판정:\(body)"
}
print(calcBMI(weight: 60.0, Height: 170.0))
케이스문

// 정수를 하나 받아서 +1 한 값을 반환하는 함수
func up(num: Int) -> Int {
    return num + 1
}

// 정수를 하나 받아서 -1 한 값을 반환하는 함수
func down(num: Int) -> Int {
    return num - 1
}

// 함수 up을 toUp이라는 상수에 할당
// Swift에서 함수는 "일급 객체(first-class citizen)"라서 변수/상수에 저장 가능
let toUp = up

// up 함수를 직접 호출 → 10 + 1 = 11
print(up(num: 10))

// toUp은 up 함수와 동일하지만, 변수에 저장된 함수는 호출 시 argument label을 쓰지 않음
// 즉, toUp(10) == up(num: 10)
print(toUp(10)) // 출력: 11

// 함수 down을 toDown이라는 상수에 할당
let toDown = down

// down 함수를 직접 호출 → 10 - 1 = 9
print(down(num: 10))

// toDown을 이용해서 호출 (argument label 생략)
// 8 - 1 = 7
print(toDown(8))
변수 내부의 함수
// 정수를 입력받아 +1 해서 반환하는 함수
func up(num: Int) -> Int {
    return num + 1
}

// 정수를 입력받아 -1 해서 반환하는 함수
func down(num: Int) -> Int {
    return num - 1
}

// 함수 up을 상수 toUp에 할당
// Swift에서 함수는 "일급 객체(first-class citizen)" → 변수/상수에 담을 수 있음
let toUp = up

// up 함수를 직접 호출 (10 + 1 = 11)
print(up(num:10))

// 함수가 변수에 할당된 경우에는 argument label(num:)을 생략하고 호출해야 함
// 즉, toUp(10) == up(num:10)
print(toUp(10)) // 출력: 11

// 함수 down을 상수 toDown에 할당
let toDown = down

// down 함수를 직접 호출 (10 - 1 = 9)
print(down(num: 10))

// 변수에 저장된 함수 호출 (argument label 생략)
// 8 - 1 = 7
print(toDown(8))

// 함수를 매개변수로 받아 실행하는 고차 함수(high-order function)
// Fun: (Int)->Int   → Int를 받아 Int를 반환하는 함수 타입
// value: Int        → 함수에 전달할 값
func upDown(Fun: (Int)->Int, value:Int){
    let result = Fun(value) // 전달받은 함수 Fun을 value에 적용
    print("result = \(result)") // 결과 출력
}

// upDown 함수 자체의 타입 출력
// ( (Int) -> Int, Int ) -> ()   타입이 찍힘
print(type(of: upDown))

// up 함수를 Fun으로 넘겨서 value=3 실행 (3 + 1 = 4)
upDown(Fun: toUp, value: 3)

// up 함수를 Fun으로 넘겨서 value=10 실행 (10 + 1 = 11)
upDown(Fun: toUp, value: 10)

// down 함수를 Fun으로 넘겨서 value=10 실행 (10 - 1 = 9)
upDown(Fun: toDown, value: 10)- 고차 함수(higher-order function)
- 함수를 매개변수로 받거나 반환하는 함수
upDown은 고차 함수
함수를 매개변수로 받아 실행하는 함수
Fun: (Int) -> Int
매개변수로 정수를 받아 정수를 반환하는
함수(또는 클로저) 타입
print(type(of:upDown))
((Int) -> Int, Int) -> ()
upDown(Fun:toUp, value: 10)
let result = Fun(value) 문장은
let result = toUp(10)
func up(num: Int) -> Int {
    return num + 1
}
func down(num: Int) -> Int {
    return num - 1 }

let toUp = up // Swift 함수는 일급
print(up(num:10))
print(toUp(10)) //주의 : argument label인 (num:) 안 씀
// **함수를 변수에 할당하면 argument label(num:)을 생략해야 함**
let toDown = down
print(down(num: 10))
print(toDown(8))

//--------------------추가--------------------
func upDown(Fun: (Int)->Int,value:Int){
    let result = Fun(value)
    print("result = \(result)")
}
print(type(of: upDown))
upDown(Fun: toUp, value: 3)
upDown(Fun: toUp, value: 10)
upDown(Fun: toDown, value: 10)

func decideFun(x: Bool) -> (Int) -> Int{
    if x {
        return toUp
    }else {
        return toDown
    }
}

let r = decideFun(x:true) // let r = toUp
print(type(of:r))  //(Int) -> Int
print(r(10))  // toUp(10)
result :
11
11
9
7
((Int) -> Int, Int) -> ()
result = 4
result = 11
result = 9
/*----추가된 코드의 결과----*/
(Int) -> Int
11
클로저 표현식
https://en.wikipedia.org/wiki/Closure_(computer_programming)
클로저란?
- 특정 작업(함수)과 그 작업이 일어난 곳(환경 또는 상태)을 모두 기억하고 있는 도구
(Swift에서는 일반적으로 클로저 표현식을 클로저로 표현)
익명함수 또는 독립적인 코드 블록으로 클로저의 하위 개념
JavaScript에서 가장 많이 사용
C, C++, Objective-C의 block
Java의 Lambda function
C#의 Delegates
{(매개변수 이름: 매개변수 타입, ... ) -> 반환 타입 in
// 클로저 표현식 코드
}
func add(x: Int, y: Int) -> Int {
return x+y
}
// print(add(x:10, y:20))
let add1 = { (x: Int, y: Int) -> Int in //익명함수라 함수 이름이 없어야
return x+y
}
print(add1(10,15))
멀티플 예제
후행클로져, swift에서의 주요활동
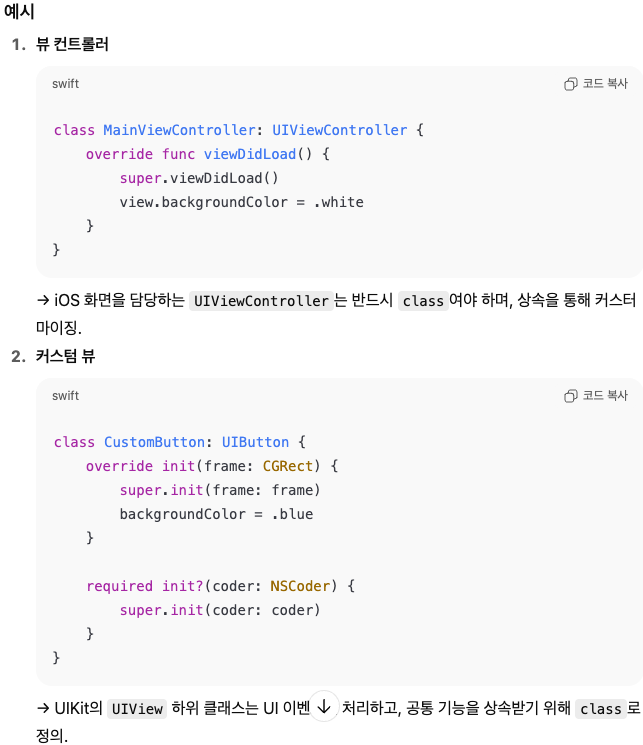
클래스 vs 객체 vs 인스턴스

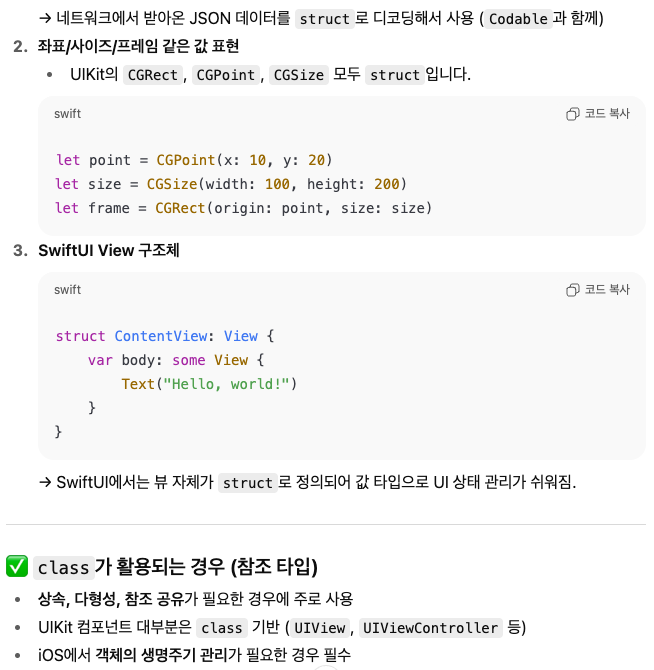
구조체는 ....


'computing' 카테고리의 다른 글
| 20251002_android_5_layout속성 (0) | 2025.10.02 |
|---|---|
| (Servlet, JSP), (MVC,MVCS), (MVVM, MVP) (0) | 2025.10.01 |
| 20250925_android4 (0) | 2025.09.25 |
| 20250922_iOS4 (0) | 2025.09.22 |
| 20250918_android3 (0) | 2025.09.18 |

